Visma DataLøn
Introduction
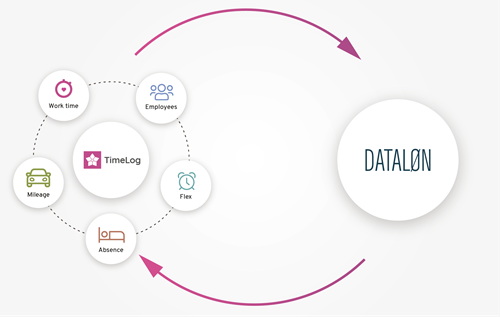
The integration to the payroll system transfers the activated absence and payroll data for the linked employees directly to the linked payroll codes in the payroll system.
Description
Important information before you start the setup
Updating employees
For Dataløn to receive employees' payroll data, the employee-ID field must be enabled in TimeLog. The payroll number is added to the TimeLog employee during the integration configuration when the field is active in TimeLog.
- Open System administration >> Employees >> Employee module settings
- Enable Show Employee ID
Connect to Dataløn
You set up the integration in System Administration >> Integrations and API >> Integrations.
- Add the Dataløn payroll integration by clicking Add Dataløn.
- If you have TimeLog MLE activated, select the legal entity that the integration should be connected to. Click Activate to add the integration.
- Click on the Configure Dataløn
- Add your Dataløn Arbejdsgivernummer. You can find the Arbejdsgivernummer under Virksomhed >> Ret oplysninger in Dataløn.
- Add the TimeLog license key. You can find the license key in Dataløn via Integrationer til andre systemer – TimeLog - Administrer.
- Click on Opret forbindels.
When the connection is established, the integration configuration opens, and you will see a green checkmark next to "Connection Established."
Dataløn integration setup
The integration configuration is divided into three steps. Each section must be completed to activate the integration.
Step 1 - Setup
Here you can see the integration's status of the connection to Dataløn and whether the integration is active.
If you click Reset, the connection between TimeLog and Dataløn is interrupted, and a new connection must be established. The previous configuration is deleted, and the three integration steps must be completed before the integration can be activated again.
Click Deactivate to disable the integration so that payroll data can no longer be transferred to Dataløn, but the connection to Dataløn remains intact.
Optional Setup
Activate Transfer only approved time records and expenses if the integration is only allowed to transfer approved time records and expenses to Dataløn. This function is only active if the module Approval flows on time, expenses and invoices is activated, and an approval process is enabled in System Administration >> Approval processes >> Approval processes.
Select which data to export
- Normal working time: Adds employees' normal working hours in the selected period
- Flex: Adds flex hours for the selected period
- Salary specification: Adds the total hours recorded on salary codes, e.g., paid overtime
- Absence: Adds the total of time registrations recorded on absence codes, e.g., vacation
- Allowance: Adds the total amount recorded from trips
- Expenses: Adds the total amount from employee recorded expenses in the selected period
- Mileage, km: Adds the total of recorded kilometers in the selected period
- Project time: Adds the time recorded on projects in the selected period. By activation, two additional options for transferring project time are added.
- For all employees: Transfers all employees' time registrations on projects.
- For selected salary groups: Transfers only project time for employees in the selected salary groups. Salary groups can only be created if the Advanced salary time registrations module is activated.
Click Next to link your employees.
Step 2- Link Employees
In this section, you need to link the active TimeLog employees with the employees in your Dataløn.
The table filter has the following options:
- Show all employees: Lists all active TimeLog employees
- Show linked employees: Displays TimeLog employees who have been linked with Dataløn
- Show unlinked employees: Displays the TimeLog employees who are not linked with Dataløn
- Show ignored employees: Displays the TimeLog employees you have previously marked as ignored
Employee Linking
The first time you link employees, the table shows all your active TimeLog employees and searches for a match on payroll number and name in Dataløn, adding one of the two status information next to the employees.
- Match, not linked: There is a match for the employee in Dataløn and is ready for linking
- No match: There is no employee match
Please note that the employee's name in TimeLog and Dataløn may differ, as the name in Dataløn contains the full name on their payslip.
When there is a match for employees
- Check the box to the right of the employee names that have the status "Match, not linked"
- Select Link under Select action and click OK
The employees are linked, and the TimeLog employee IDs are added/overwritten with the number from Dataløn.
It is also possible to click directly on "Match, not linked" to link the employee.
Linked employees without a match
If the integration did not find a match on name and payroll number, and the table filter is set to Show unlinked employees or Show All Employees, the Dataløn table column shows Select Employee and No Match in the status column next to the employee.
- Select the current Dataløn employee from the list and the status changes to Match, Not Linked
- Check the box to the right of the employee
- Select Link under Select Action
- Click OK
It is also possible to click directly on Match, Not Linked to link the employee.
Ignore Employee
If a TimeLog employee should not be linked with Dataløn:
- Check the box next to the employee
- Select the action Ignore employees
- Click OK.
Ignored employees can subsequently be linked through the filter selection Show ignored employees.
Remove employee association
Select Show linked employees in the table filter.
- Check the box to the right of the employee
- Select the action Remove link
- Click OK
It is also possible to click directly on the status information Linked, to remove the association of the employee.
The employee will then be seen in the table when the filter is set to Show all employees or Show unlinked employees, with the status Match, unlinked.
Step 3 - Link salary codes
In this section, you need to link your salary and absence codes to ensure that data is transferred to the correct code in DataLøn.
When linking salary and absence codes, TimeLog's salary and absence codes are assigned/replaced with the linked DataLøn code number.
By default, TimeLog only transfers the number of hours and kilometers to DataLøn. Therefore, you must choose a DataLøn code that does not contain a rate. Only employee-paid expenses and allowances are transferred as amounts. (Example: Kilometers are chosen for 0024 Skattefri km 1)
The filter option above the table only shows activated TimeLog salary and absence codes and can be selected for the following views:
- Show all codes: Lists linked and unlinked salary and absence codes in TimeLog
- Show linked codes: Shows only the linked salary and absence codes
- Show unlinked codes: Shows the salary and absence codes that are not linked with DataLøn
Link TimeLog salary and absence codes
Select Show unlinked codes in the filter, and the DataLøn table column will show Select salary code next to the TimeLog codes.
- Select the corresponding salary code from the DataLøn list, and the salary code will get the status Match, unlinked.
- Check the checkbox to the right of the code.
- Select Link under Select action.
- Click OK.
It is also possible to click directly on Match, unlinked, to link the salary code.
If you do not link all displayed TimeLog salary and absence codes, the salary code will still be seen in the Transfer payroll data table but will lack the salary code, and it will not be possible to transfer the registered payroll data from the code to DataLøn.
Remove salary code linking
Select the filter option Show linked codes or Show all codes.
- Mark the checkbox to the right of the code.
- Select the action Remove link.
- Click OK.
It is also possible to click directly on Linked, to remove the linking, and the status changes to Match, unlinked.
The salary or absence code will then appear in the table when the filter is set to Show all codes or Show unlinked codes, with the status No match.
Confirm integration setup
Once you have completed the configuration of the three setup sections, click Activate to enable the integration, and you are now ready to transfer payroll data to DataLøn via the Transfer salary data page.
Changes made after activation will be applied during the next payroll transfer.
The integration has activated the Integration Log report, which can be added for employees who need to see the transfer status for each employee.
Changes in linking employees and linking salary and absence codes are also reflected in the integration log.
Please give it a thumbs up or down.
Please write a comment.