Zenegy
Introduction
Description

Enable Employee ID so that the integration can add the employee number when linking.
1. Go to System administration -> Employees -> Employee module setup
2. "Tick" Show employee ID
Zenegy integration setup
Connection to your Zenegy installation is established and the integration is ready for configuration.
You set up the integration in System administration -> Integrations and API -> Integrations.
Add and connect.
We recommend that you use an extra Zenegy licence for the integration to avoid losing connectivity if an employee no longer works for you.
1. Click Add Zenegy. If you have multiple legal entities, select the current legal entity and click Activate
2. Click Connect and add your email and password to Zenegy
3. Click AUTHORISE ACCESS in the pop-up window
4. Click Close Window and the connection is established
Set up
In this section, select which data to transfer to Zenegy
Optional setup
Enable Transfer only approved time registrations and expenses if only approved time registrations and expenses can be transferred to Zenegy. This feature is only active if the approval module is active and the approval processes are enabled.
Select which data to transfer
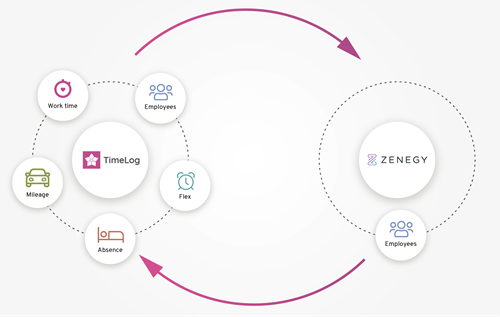
Absence: Adds the time registered on absence codes, e.g. holiday
Expenses: Adds employee paid expenses to the transfer.
Mileage, km: Adds the number of kilometres driven and transferred as separate records in Zenegy.
Project Time: Adds the time registered on projects
- For all employees: Transfers data without restrictions
- For selected salary groups: Only transfers data for employees in the selected groups. Click in the field and add the desired salary group(s)
Link employees
In this section, you link the created TimeLog employees with the employees in Zenegy.
The filter above the list is set to Show all employees the first time you enter the page, and afterwards, the system will show the linked employees.
- Show all employees: Lists all employees who are active in TimeLog
- Show linked employees: Lists the employees who have been linked to Zenegy
- Show unlinked employees: Shows the employees who have not been linked to Zenegy
- Show ignored employees: Shows the employees you have previously ignored
The first time you set up, the integration automatically looks for matching employees from Zenegy with the same name and ID and suggests them in the Status column.
- Match, not linked: The integration sees a match on name and ID
- No match: The integration does not find a match between name and ID
- Linked: Employees that are linked
Link Match, not linked employees
Select the checkbox to the right of the employee name.
Select Link under Select action and click OK.
The employee is now linked and has the status Linked. When linking, the Zenegy employee number is added to the TimeLog user.
Link No match
Select an employee name in the Zenegy column, select the action Link and click OK.
The employee is now linked and has the status Linked. When linking, the Zenegy employee number is added to the TimeLog user.
Ignore TimeLog employee
If a TimeLog employee should not have registrations transferred to Zenegy, tick the checkbox and select the action Ignore employee and click OK.
The employee will then not be included in the salary transfer.
You also have the option to unlink and ignore employees via Select action if you need to do so at a later time.
Link salary codes
In this configuration section, TimeLog absence and salary codes are linked to Zenegy. Only TimeLog absence and salary codes that have the Include in export to payroll system checkbox selected are shown in the TimeLog column.
The first time you perform the setup, the filter is set to Show all codes and the Zenegy column shows Select salary code and status No match. You have the following filter choices for the table.
- Show all codes: Lists all linked and unlinked TimeLog codes.
- Show linked codes: Lists all linked TimeLog codes.
- Show unlinked codes: Lists TimeLog codes that are not linked
Select the Zenegy code to which the TimeLog code's registrations should be transferred, select the action Link and click OK. The status changes to Linked and the Zenegy code is added to the TimeLog code. The employee registrations can now be transferred to Zenegy.
TimeLog project time and kilometres are preselected and cannot be changed.
Unlinked codes are unlinked by ticking the checkbox on the far right, select the Unlink action and click OK. The status will change to Match, not linked and you can select another Zenegy code for the linking. You can also click on the status text to change the status.
Special remarks
Link absence codes
For TimeLog to be able to transfer registrations on absence codes to Zenegy, the absence codes in TimeLog must have code numbers as in the example in the table below.
|
Absence codes |
TimeLog |
Zenegy |
|
20 |
Vacation |
Vacation |
|
21 |
Extra vacation day |
Vacation free day |
|
25 |
Paid maternity leave |
Paid maternity leave |
|
26 |
Unpaid paternity leave |
Unpaid paternity leave |
|
30 |
Illness |
Illness |
|
31 |
Child’s first sick day |
Child’s sick days |
|
32 |
Care day |
Care day |
|
33 |
Training and education |
Training and education |
|
34 |
Business travel in EU |
Business travel in EU |
|
35 |
Business travel outside EU |
Business travel outside EU |
|
36 |
Other |
Other |
If you need to differentiate on the absence in TimeLog, it is possible to have two or more absence codes with the same number. The registrations are then summarised on the same absence type in Zenegy.
Please give it a thumbs up or down.
Please write a comment.