How to create a new employee
You can create a new employee if you go to '+'.
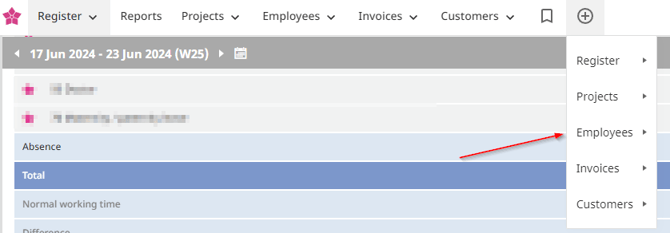
From there go to 'Employees' and click '+ new employee'.
Get started
When you create a new employee, you need to enter relevant information. However, not everything is mandatory.
We have indicated all mandatory fields with a star*. These must be filled in before you can click Save.
We have divided the information into four groups:
- Personal information
- Organisational information
- Work time and salary information
- License and rights
Personal information:
Here you define the employees' information.
- First name(s) and Last name of your new employee in the respective fields*
- The Username: Used when logging into TimeLog. We recommend that you use the employee's work e-mail, so it is faster for your employees to log in*
- Initials: Used for employee selection and views in reports in TimeLog*
- Job title: Specifies which role your employee should have within the programme.
- The employee’s e-mail: Used to send the activation e-mail and notifications from TimeLog. The activation mail is valid for 24 hours.*
If you have additional personal information that you would like to add, we recommend using Comments.
Organisational information:
Here you enter or select:
- Department: must be the department the employee is linked to, and thereby shown in the reporting*
- Legal entity: the entity the employee is linked to, and thereby shown in the reporting (only available with Multiple Legal Entities)*
- Manager: the manager, who should approve the employee’s time registrations and expenses*
- Employee ID: applicable if it is activated in the system administration. Often used when creating reports through our APIs and for our salary integrations
- Employee type: used to limit the search in several reports
- Date of employment: important as the flex calculation for the employee starts on this date. You cannot track time on a date that lies before your date of employment*
- Date of resignation: applicable if it is already known. E.g. in cases of fixed-term employment relationships. The flex calculation ends automatically after this date, but the employee will still be able to log in.
Mark Deactivate automatically on the resignation date, if you want to close down the access to the system on the resignation date. Otherwise, this needs to be done manually on the employee card. - Default hourly rate for customers: The selected default price for the employee. This will be suggested when allocating them to project tasks. Note: This can always be changed both on the single project and the employee card if you want a different default hourly rate suggestion for the employee
- Internal cost: used to calculate the cost of time & material. This is shown in project totals and reports. Each employee can only be assigned one internal cost
- OIO ID: only shown if OIOXML (e-invoicing) is activated in the System Administration
Work time and salary information:
Here you enter or select:
- The public holiday calendar: used in the employee’s timesheet and the resource planning
- Allowance legislation: used when entering travel expenses, if it is activated in the system administration
- Normal working time: forms the basis of the employee’s flex calculation
- Salary code group: needs to be activated in the system administration. Here you select which salary codes the employee should see in the timesheet
- The pay period: determines which pay period the employee should belong to, e.g. per month or every 14 days. You need to enable Advanced salary time administration in the system administration to be able to select a different pay period on the employee cards and in reports that filter on pay period
License and rights:
Here you enter or select:
- Access to extensions: e.g. TimeLog CRM, if you have bought this module
- Roles: Select which roles the employee should have in the system. This determines which functionalities the employee has access to. If you do not select any roles, the employee will not be able to use the system
- Activate: Enter when the employee should be activated, now, manually later, or on a specific date. When the user is activated (regardless of whether you do it now, manually later, or automatically on a given date), (s)he will automatically receive an activation e-mail to TimeLog. The activation mail is valid for 24 hours
Click the Save button to create your new employee.
You can always change the settings for an employee by opening the Edit Employee page.
Good to know
When the employee is created, they can enter the personal contact information on their profile, after which the information will be available on the employee card.
Note: you may not see all of the above-mentioned information. It depends on your version of TimeLog and your add-on modules, and thereby which functionality and processes you have access to.
You are always welcome to contact info@timelog.com if you have questions about your subscription.