TimeLog for Desktop
Introduction
TimeLog for Desktop is the perfect registration method for you, if you work on various tasks during the day and a lot in front of your computer. You can download TimeLog for Desktop in the menu Register -> Time tracking apps.
Description
What is TimeLog for Desktop?
TimeLog for Desktop is part of our cross-platform tracking concept, and it allows you to track project time on the fly and easily change tasks during the day without logging into a web page. This helps you improve the accuracy in your time tracking enabling you to invoice more hours. TimeLog for Desktop is synchronised with your TimeLog Mobile app and the web application, and you can start and stop registrations across platforms.
If you already use our Mobile app, you are well-equipped to start using TimeLog for Desktop, as it includes almost the same functionality and the same design features.
Get started
TimeLog for Desktop is divided into three main areas: Search, time tracking overview and personal settings. You can read more about the three areas below.
Search for tasks
You use the search field to find the task or absence code, which you would like to track time on. If you have already tracked time via the web interface or the Mobile app, the search results show the most recent tasks you have tracked time on. If you do not find the task you need, you can start your search by entering the search field.
If you select Absence, you are presented with the absence codes, which your system administrators have set up for you.
If you select Work, you will get Customers, Projects and Tasks as search categories.
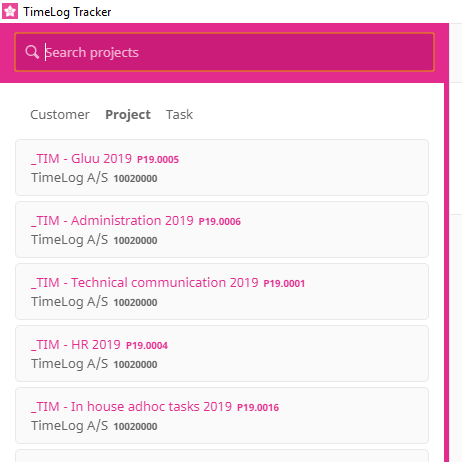
When you start typing in the search field, TimeLog for Desktop will filter the results as you key in the characters and display the customers, projects or tasks which match your search criteria.
When you click a match in your search results, you are taken to the next level in the search process. If you select a specific customer in the list, you will see the projects for that customer. When you select a project, you will see the available tasks for time tracking.
You can navigate the search results with the arrow down and arrow up keys and "click" start or plus icon to start time registrations through keyboard shortcuts. If you use the left and right arrows, you can also change between the search categories customers, projects and tasks in the search list. If you are used to working with the keyboard, this will save you a lot of mouse clicks and make your time registration more efficient.
Search configuration
Clicking the three vertical dots in the search panel opens up the search configuration. Here, you can chose between searching your own tasks or in all available tasks in the system, if allowed by the system administrators. You can configure a keyboard shortcut to toggle between the two options. Read more about keyboard shortcuts under Personal settings below.
Track time
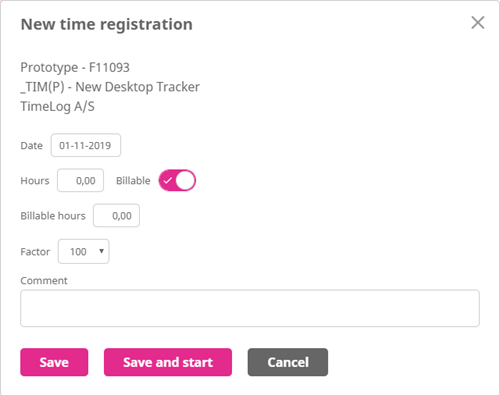
Once you have found your task in the search, you can start your time tracking. You can either click the plus to add a registration or the play icon to start the registration right away. The play icon is only available, if stopwatch time tracking is enabled by your system administrator.
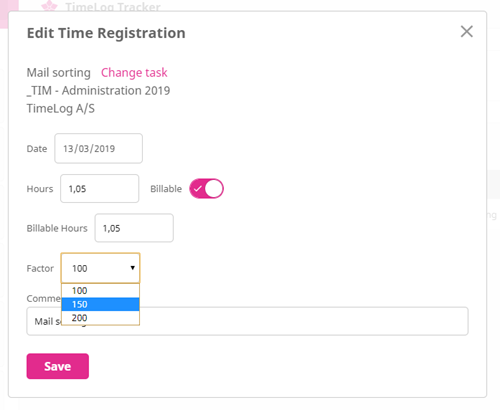
If you click to add the registration, you will have the option to add details and a comment before you start the registration, and you are also able to add registrations for other dates. The options you see may differ, as they depend in the settings made by your system administrator.
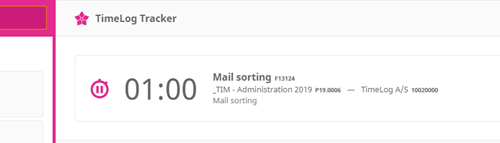
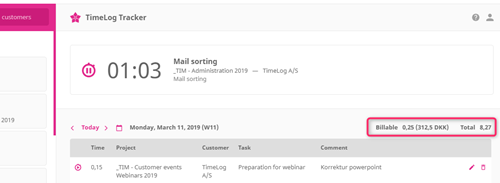
The time tracking status window at the top shows the active time registration including the comment, if you have added one:
Watch this video to see how to track time:
See this video to see how to track absence:
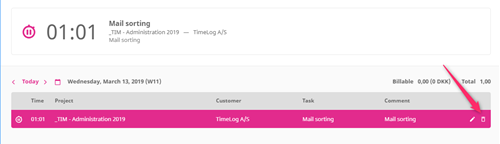
Time tracking list
In the list, you will see your registrations during the day. If you have planned tasks via Outlook and added them as bookings in TimeLog or planned absence registrations from the web or Mobile app, the registrations will show on the date they take place, and you are able to change the duration directly in TimeLog for Desktop.
![]()
If you double click the time or the comment column of a time registration, you open an input field where the time or comment can be changed without having to open the registration in edit mode. You can always edit change task or properties for a registration by clicking the pencil icon to the right, and you can delete it by clicking the trash can.
Every time you perform an action, a small text notifications appears, so you know that the action was completed correctly.
If you use the stopwatch and click the start / pause icon on a task in today’s time registration list, it will re-start/pause the time tracking on the task. If you click the start icon on a task on a previous day, it will start time tracking today on a copy of the time registration incl. the comment.
If the option is enabled by your system administrator, you will be able to see the billable value of your time registrations:
Personal settings
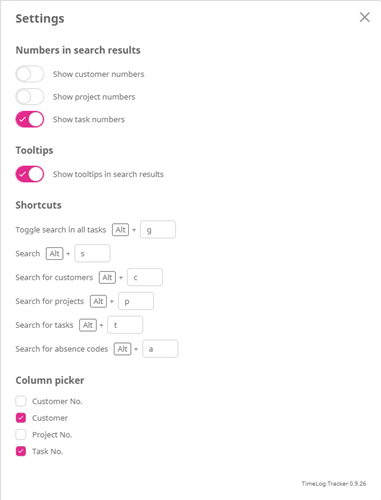
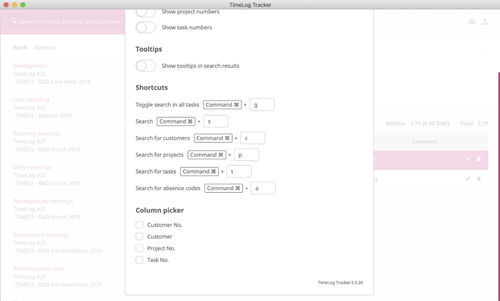
In the top right corner, you have the option to select Settings.
![]()
In here, you have the option to select a number of personal settings, which allow you to customise your TimeLog for Desktop experience. If you use a Mac, you will also have the option to set shortcuts for Mac.
Submit timesheet from Desktop tracker
You can close your weekly timesheet in the desktop tracker by clicking the arrow in the top right corner.

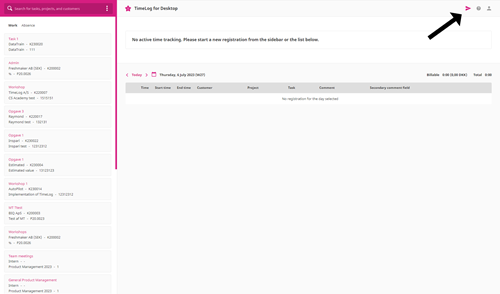
Good to know:
The submit function works with the submission rules and you will get the information when you press the submit button and are in conflict with the rules.
When pressing the submit button, the start date and end date will be auto-filled with the start date and end date of the current week.
If registrations are rejected, you will not be informed by the system in the Desktop Tracker interface, but you will be able to correct the registration and re-submit it.
Please give it a thumbs up or down.
Please write a comment.