DataLøn
Introduction
You set up the integration in the System administration -> Integrations & API -> Integrations.
Description
You must activate Employee ID in TimeLog to ensure correct integration setup.
- Go to the System administration ->Employees -> Employee module settings
- Check Show employee ID
Important information before you start the setup
Vacation days transfer to DataLøn as decimal figures in full or half days. Therefore, we recommend you to set up your vacation absence codes to run in full or half days. If your code is set to hours, the numbers will not match in the export.
All other absence and salary codes transfer in hours or pieces. The matching codes in DataLøn must be set up without a rate, as you cannot select one in TimeLog.
Allowance registrations and expenses transfer to DataLøn as amounts. Allowances have their own calculation model and transfer as a sum based on the calculation. The expenses transfer as a total amount for all expenses within the salary period.
Connection setup
- Click Add DataLøn
- If you use TimeLog MLE, select legal entity and click Activate
- Enter Employer no.
- Enter License key
- Click Connect
Optional setup
- Transfer only approved time registrations and expenses: Limits the integration to only select the registrations and expenses approved by a manager within the selected period
Select salary data for transfer
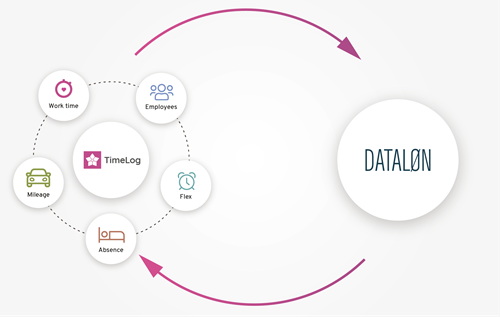
- Normal working time: Adds the normal working time added to each employee on the employee card
- Flex: Adds the flex hours for the selected period
- Salary specification: Adds the time tracked on salary codes, e.g. paid overtime
- Absence: Adds the time tracked in absence codes, e.g. vacation
- Allowances: Adds the registrations from travels
- Expenses: Adds the amounts from the expenses
- Mileage, km: Adds the number of kilometers driven
- Project time: Adds the time tracked on projects
- For all employees: Transfers data with no limitations
- For selected salary groups: Transfers data only for the employees in the selected groups
Link employees
The filter at the top is set to Show all employees the first time you enter the page, and afterwards it will show the linked employees.
- Show all employees: Lists all employees which are active in TimeLog
- Show linked employees: Shows all employees linked with DataLøn
- Show unlinked employees: Shows all employees not linked with DataLøn
- Show ignored employees: Shows the employees you have ignored previously
First time you do the setup, the integration automatically looks for matching employees from DataLøn with the same name and ID and suggests them in the list.
- Match, not linked: Shown with yellow marking
- No match: Shown with grey marking
- Linked: Shown with green marking
Link employees
- Select an employee in the list
- Mark the checkbox next to the employee name
- Select Link in the Select action menu
- Click OK
If the ID from your employee in DataLøn is different from the one in TimeLog, the integration automatically updates TimeLog with the one from DataLøn.
You also have the option to remove the link and ignore employees via the Select action menu, if you need to at a later point in time.
You need a TimeLog user license per employee you add in TimeLog.
If you deactivate an employee which is linked to DataLøn, the link will still be there between the two systems.
Link salary and absence codes
You need to link your salary and absence codes to ensure the data ends up in the right place in DataLøn and added correctly to the payslips. Please note: You need to first check the single absence codes and mark that the data can be used in salary data exports.
As default, TimeLog only transfers number of hours or kilometers to Dataløn. You therefore must select a DataLøn code that doesn't contain a rate. Only employee paid expenses or allowances transfer as amounts.
The filter at the top shows all salary codes by default and you may select the following views:
- Show all codes: Lists all active codes available in TimeLog
- Show linked codes: Shows the codes linked with DataLøn
- Show unlinked codes: Shows the codes not linked with DataLøn
Link codes
- Select a code in the list
- Mark the checkbox next to the code name
- Select Link in the Select action menu
- Click OK
You also have the option to remove the link via the Select action menu, if you need to at a later point in time.
The codes show with different status depending on how far you are in the process.
- Match, not linked: Shown with yellow marking
- No match: Shown with grey marking
- Linked: Shown with green marking
Confirm integration setup
Click Activate once you've linked your employees. Now you’re ready to transfer data via the Transfer salary data page.
Special remarks
Changes to both linking of customers and salary and absence codes are marked in the integration log.

Please give it a thumbs up or down.
Please write a comment.